DIY Smart Window Shades with Home Assistant: A Complete Guide
Window shades add comfort and privacy, but manually adjusting them throughout the day can be tedious. While many commercial smart shade options exist, they often rely on cloud services or require permanent installation — not ideal for renters or privacy-conscious users. This guide explores a custom-built solution using Home Assistant, inspired by Rooster Robotics' project, which uses an ESP32-S3 module, a magnetic rotary position sensor, and angled gearing to automate roller shades without cloud dependency. Below, we answer common questions about building and controlling your own smart shades.
Why would someone build a DIY smart shade instead of buying a commercial one?
Commercial smart shades, like the Aqara Roller Shade Driver E1, often require a cloud account or proprietary hub, which can be a dealbreaker for privacy advocates or those in rental properties. Rooster Robotics wanted a solution that was both non-intrusive — no permanent wall modifications — and fully local, avoiding any forced remote access. Building your own system gives you complete control over data, security, and customization. You can integrate it with any home automation platform, such as Home Assistant, without being locked into a specific ecosystem. Additionally, DIY allows for tailored mechanical designs — like angled gearing to keep the motor flush against the wall — which commercial products may not accommodate. If you're comfortable with electronics and 3D printing, this path offers both flexibility and satisfaction.
Are there truly no commercial shades that work without a cloud account?
While Rooster Robotics initially claimed a lack of such options, commenters pointed out that the Aqara Roller Shade Driver E1 uses Zigbee and can be paired with local hubs like Zigbee2MQTT or ZHA, bypassing the cloud entirely. However, these devices still rely on a compatible Zigbee coordinator and may require some tinkering to achieve full local control. Many commercial options also assume a standard window frame or motor orientation, which may not suit every installation. For those seeking a truly custom and open-source approach — where every component is chosen and controlled — DIY remains a compelling choice. The Aqara driver is a good alternative, but it doesn't offer the same level of hardware hackability or mechanical adjustability as a self-built system.
How do you measure the shade's position without relying on cloud feedback?
Accurate position sensing is crucial for opening shades to a specific level. The initial design used a Hall effect sensor and magnets attached to the roller, but this proved low-resolution and difficult to calibrate. Rooster Robotics later switched to an AS5600 magnetic rotary position sensor, which requires only a single magnet on the rotating shaft. This sensor provides 12-bit resolution, giving precise angular data that maps directly to how far the shade has opened. The sensor communicates over I2C to the ESP32-S3, which then uses Home Assistant to calculate and trigger desired positions. This local sensing means no cloud polling is needed, ensuring fast, reliable automation and preserving user privacy.
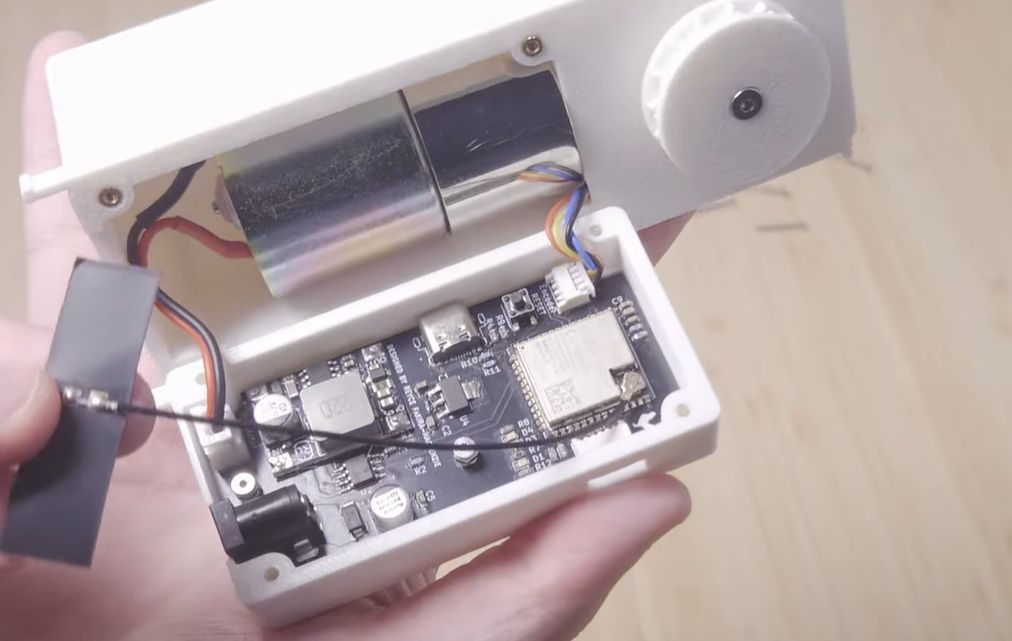
What hardware did Rooster Robotics use for the motor and control board?
The brain of the system is an ESP32-S3 module, chosen for its built-in Wi-Fi and Bluetooth, enabling direct integration with Home Assistant. A custom PCB was designed to house the microcontroller, motor driver, and sensor connections. The motor itself is a small DC geared motor that drives the roller via a custom 3D-printed gearbox. To keep the motor parallel to the wall — avoiding an ugly protrusion — the team used angled gearing. This mechanical adjustment ensures the entire assembly sits flush against the wall, similar to commercial cordless shades. Power is supplied via a standard USB-C connection, making it easy to plug into any nearby outlet or power bank.

How does Home Assistant integration work in this DIY setup?
Home Assistant communicates with the ESP32-S3 over Wi-Fi using a custom ESPHome configuration. The ESPHome firmware exposes the AS5600 position data and motor controls as entities in Home Assistant. You can create automations — like scheduling shades to open at sunrise or close when the room reaches a certain temperature — using the familiar Home Assistant interface. The position sensor allows for percentage-based open/close commands: for example, "set shade to 50%" will drive the motor to the corresponding angle. Security is handled locally, so no internet connection is required once the setup is complete. All data stays within your network, and you can override any automation manually through the Home Assistant dashboard or voice assistants like Alexa if integrated locally.
Is the design open source, and can I build one myself?
As of now, Rooster Robotics has not released the design files publicly, but they have stated they are considering open-sourcing the project in the future. This means you cannot currently download the PCB layout or STL files for the 3D-printed parts. However, the concept is well-documented in their video and blog posts, providing enough detail for experienced makers to replicate the approach with off-the-shelf components (ESP32, AS5600, motor driver). If you're eager to build your own, you can start with a generic ESP32 and a magnetic rotary sensor, then design your own gearbox based on your roller shade's dimensions. Keep an eye on Rooster Robotics' channels for potential open-source release.
What are the main challenges when building a smart shade like this?
Three key challenges emerged: accurate position sensing, motor alignment, and firmware complexity. First, achieving reliable position feedback requires a high-resolution sensor like the AS5600, paired with careful calibration to handle backlash in the gear train. Second, the motor must be aligned parallel to the wall to avoid an unsightly bump; the angled gearbox solves this but adds mechanical complexity. Third, writing ESPHome code to manage motor direction, speed, and position limits can be tricky, especially if you want seamless Home Assistant integration. Additionally, power management — ensuring the motor has enough torque for various shade weights — and heat dissipation in a compact enclosure are practical concerns. Despite these challenges, the end result is a fully controllable, local-only smart shade that outperforms many commercial options in flexibility and privacy.